Normally you would run all JUnit tests to ensure that changes haven’t broken any of the tests. But sometimes you want to focus on a single test method and only rerun that test, especially if running all tests is too slow or if you write a single (failing) test upfront.
For example, in the following code you might only want to run testMethod2():
public class SomeTest {
   @Test
   public void testMethod1() {...}

   @Test
   public void testMethod2() {...}
}
Eclipse provides a couple of ways to run individual test methods, one from within the editor itself and another from the JUnit view. It also has especially good keyboard support so you can run those tests without reaching for the mouse.
Run from inside the class editor
The easiest way of running a single JUnit test method is to run it from within the test case’s class editor:
- Place your cursor on the method’s name inside the test class. I’d recommend using the keyboard to navigate to the method, especially if there are many tests.
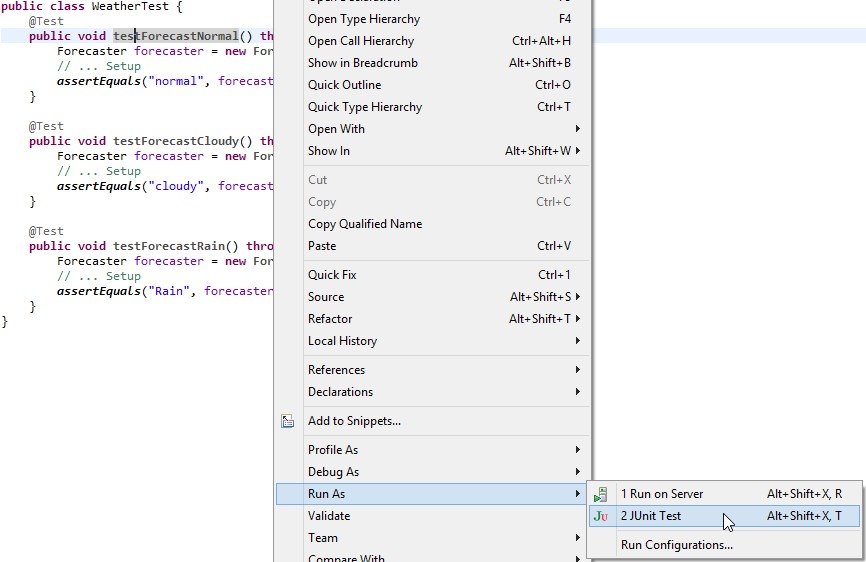
- Press Alt+Shift+X,T to run the test (or right-click, Run As > JUnit Test).
- If you want to rerun the same test method, just press Ctrl+F11. For this to work, ensure that you’ve told Eclipse to always run the last launched application.
Here’s how to only run testForecastNormal() in the following example:
Tip: An equivalent way of doing this is by going to the Outline view and running the method from there. The end result is the same as running the test method from the class.
Run from the JUnit view
Another way to run a JUnit test method is to run it from the JUnit view. To accomplish this, you’ll first have to run the entire set of tests in the test case.
- Run all the tests in the test class using Alt+Shift+X, T or right-click, Run As > JUnit Test.
- Go to the JUnit view and expand all the tests that ran.
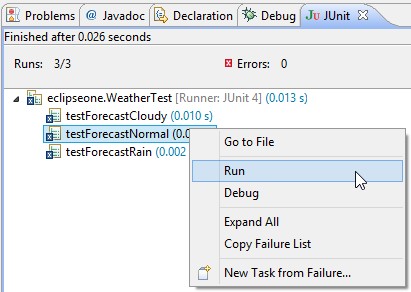
- Right-click on the desired test method and click Run.
- Note that pressing Ctrl+F11 will rerun all the tests in the test case, not just the one you just ran. If you want to rerun the test, go back to the JUnit view and click the run button at the top of the view:

 The example above shows how to run the method testForecastNormal() from the JUnit view.
Difference between the techniques
So, what’s the difference between the two and which one should you use? Here are some of the differences:
- Running from the class creates an Eclipse run configuration whereas running from the JUnit view doesn’t.
- If you ran from the editor, you can rerun the last test using Ctrl+F11. From the view you can only rerun from the view.
- Running from the view uses the same setup of the run configuration as running all tests. This is useful if you have customised the run configuration for particular tests, eg. when using SWTBot or running integration tests with required framework setup.
I’d recommend running from the class as the default and the only time you’d really want to run from the view is when you want to reuse customised run configuration.
Related Tips
- Jump to the start and end of methods, loops, blocks and XML tags
- Quick ways to navigate Eclipse editors using the keyboard
- JUnit testing made easier with Eclipse templates
- Generate static imports in Eclipse on autocomplete for JUnit Assert, StringUtils and others
- Instantly show a class/file in the Package/Project Explorer in Eclipse

